DataHub OneProvider
This documentation covers how to install and configure a OneData OneProvider in order to join a new or existing EGI DataHub space. In particular two types of installations are available, depending if the provider wants to support the space with an empty storage or if existing data should be exposed via the Oneprovider.
Requirements for production installation
- Oneprovider
- RAM: 32GB
- CPU: 8 vCPU
- Disk: 50GB SSD
- To be adjusted for the dataset and usage scenario
- For high Input/Output operations per second (IOPS)
- High performance backend storage (CEPH)
- Low latency network
Network Requirements
- The following ports need to be open on the local and site firewall:
- 80, 443, 9443, 6665 (for data transfer)
Warning
The Oneprovider installation includes also a Memcached server running on port 11211. Please ensure that this port and other unused ports are not open to the internet by setting up proper local firewall rules.Installation and attach empty storage to the EGI DataHub
The installation of a new Oneprovider is performed using the onedatify
installation script which will setup the components using Docker and
Docker-compose.
This simple installation script can be generated from the EGI DataHub interface.
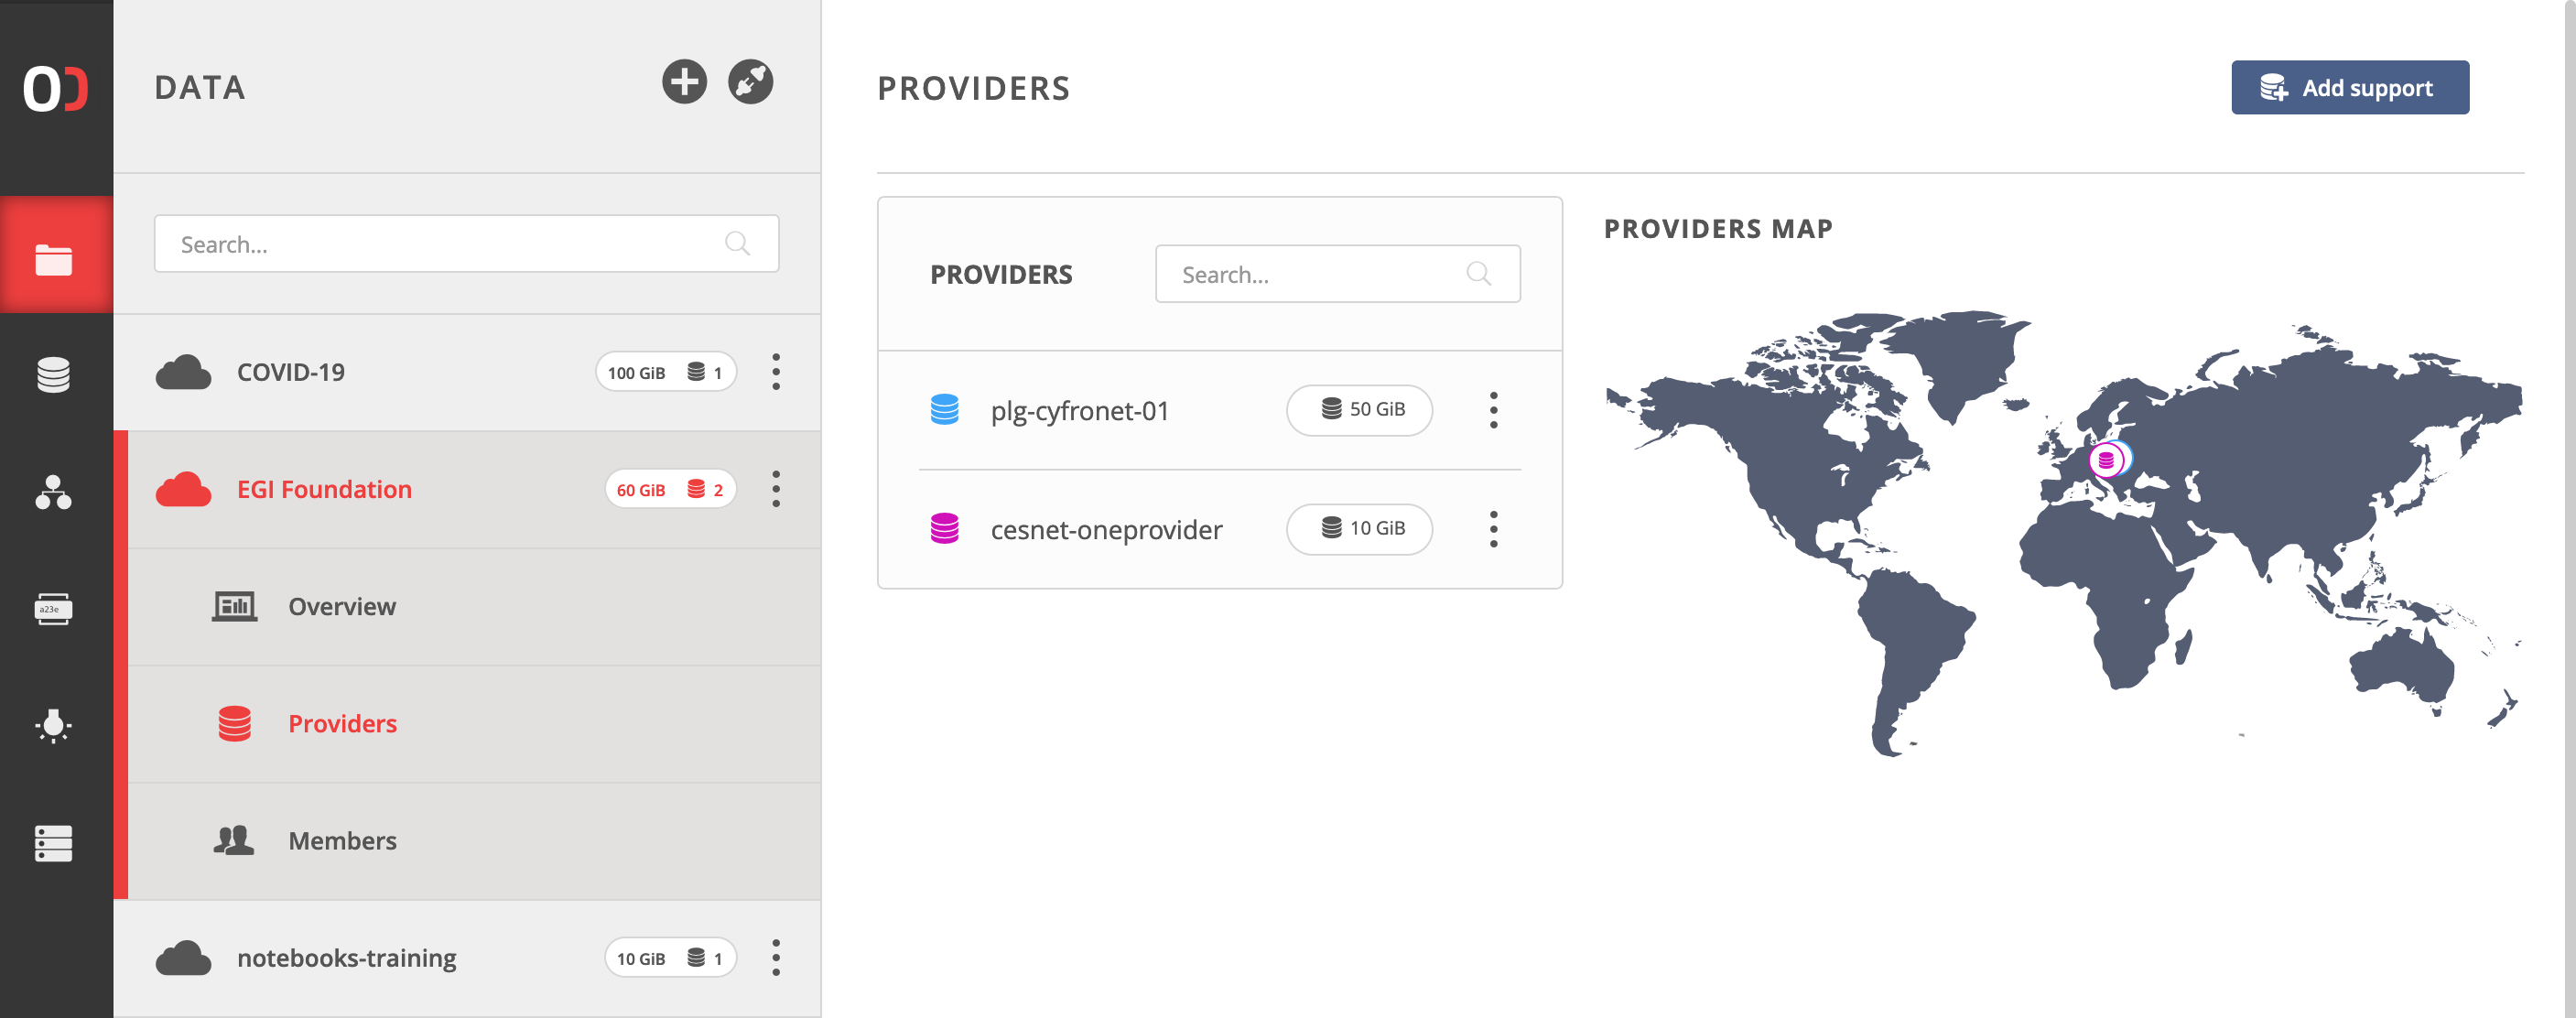
Firstly, you need to login to the EGI DataHub and using the Data menu you
either select an existing space or create a new one.
Secondly, you can select on the space menu the Providers section and click on
the Add Support button on the top right corner.
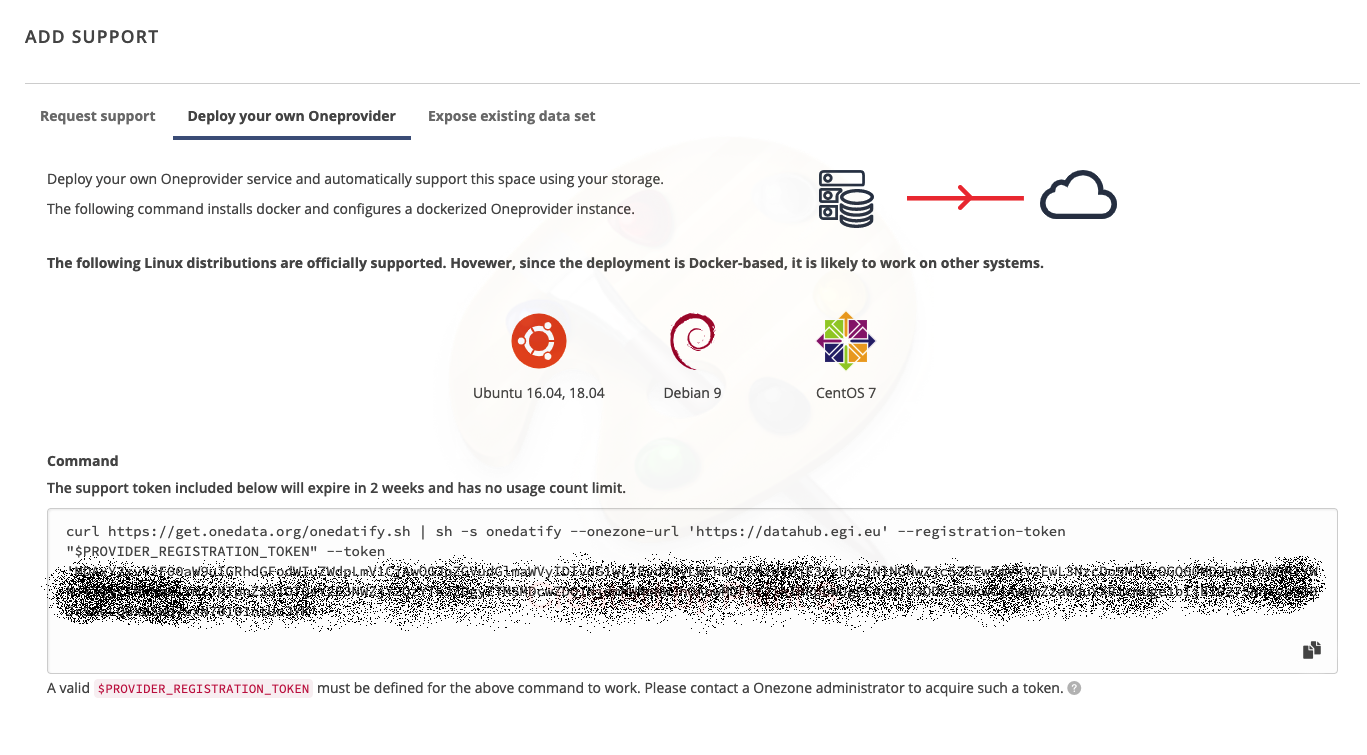
You should then select on the page the tab: Deploy your own provider
In order to obtain the PROVIDER_REGISTRATION_TOKEN that is part of the
preconfigured command, you need to contact the
EGI HelpDesk, selecting DataHub as Group.
Please include in the request the following info:
- Use case for the installation of a Oneprovider connected to the EGI DataHub
- Name and the email of the Oneprovider admin
- domain name of the Oneprovider
Run the command on the host
With the obtained PROVIDER_REGISTRATION_TOKEN, paste the copied command in the
terminal on the Oneprovider machine as superuser.
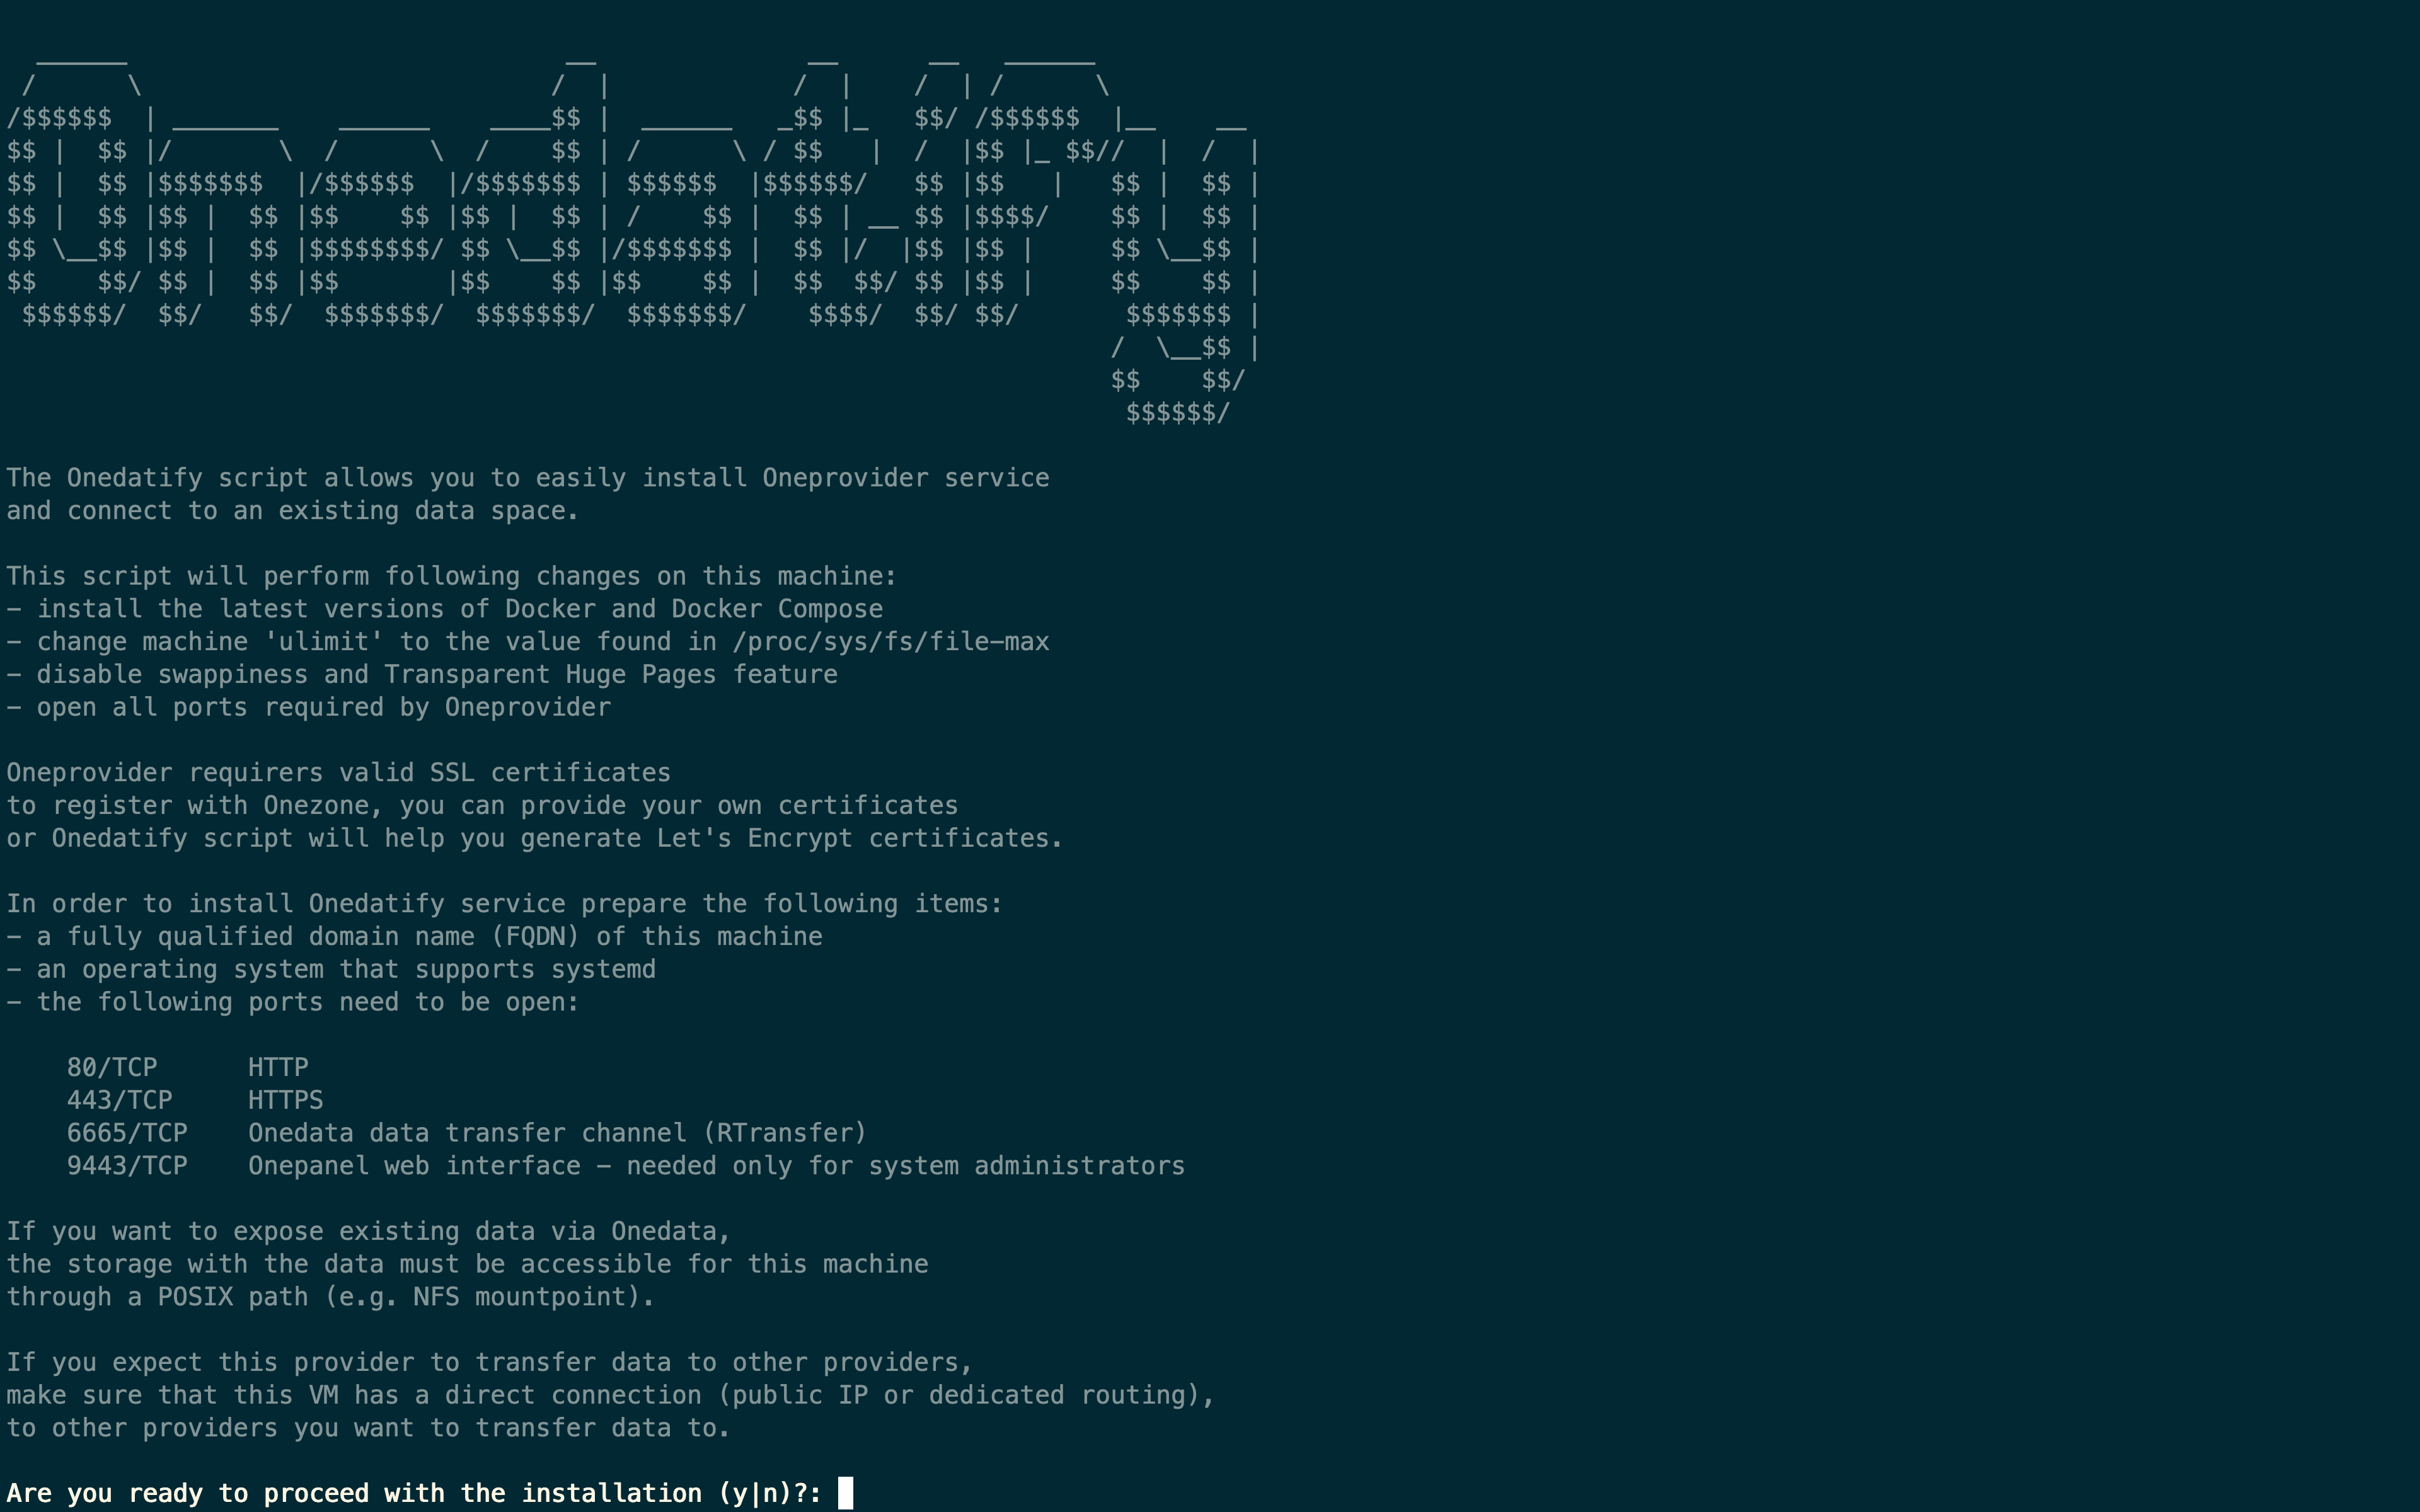
If necessary, the Onedatify script will ask for permission to install all necessary dependencies including Docker and Docker Compose.
After the dependency installation is complete, the script will ask several questions and suggest default settings:
The progress can be monitored on a separate terminal using the following command:
onedatify logs
After the deployment is complete, a message will be shown, including connection details for the administration panel of the Oneprovider:
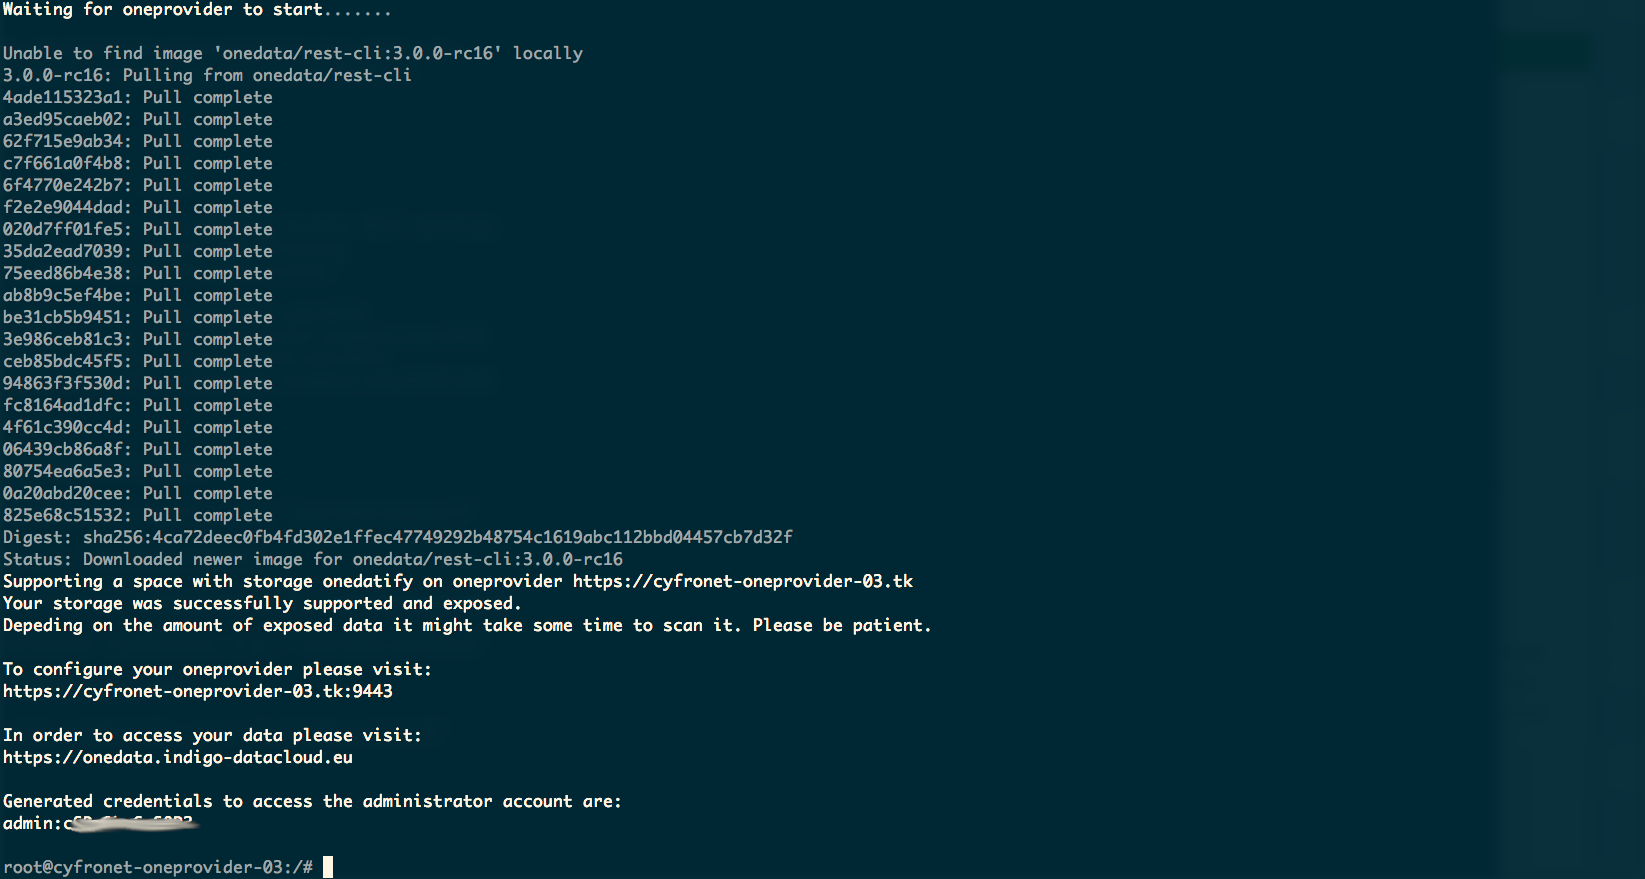
This administration panel at port 9443 can be used to administer the
Oneprovider.
Installation and expose existing data to the EGI DataHub
The installation of a new OneProvider to expose existing datasets to an EGI DataHub space is similar to the installation with an empty storage.
When adding support to an existing or new space you should select from the EGI
DataHub user interface the tab : Expose Existing dataset.
Please refer to the steps described in the
Installation and attach empty storage to the EGI DataHub
section to request a PROVIDER_REGISTRATION_TOKEN.
Once obtained, you will have to copy the command already configured with the
correct parameters for the Onezone (datahub.egi.eu) and the space to join.
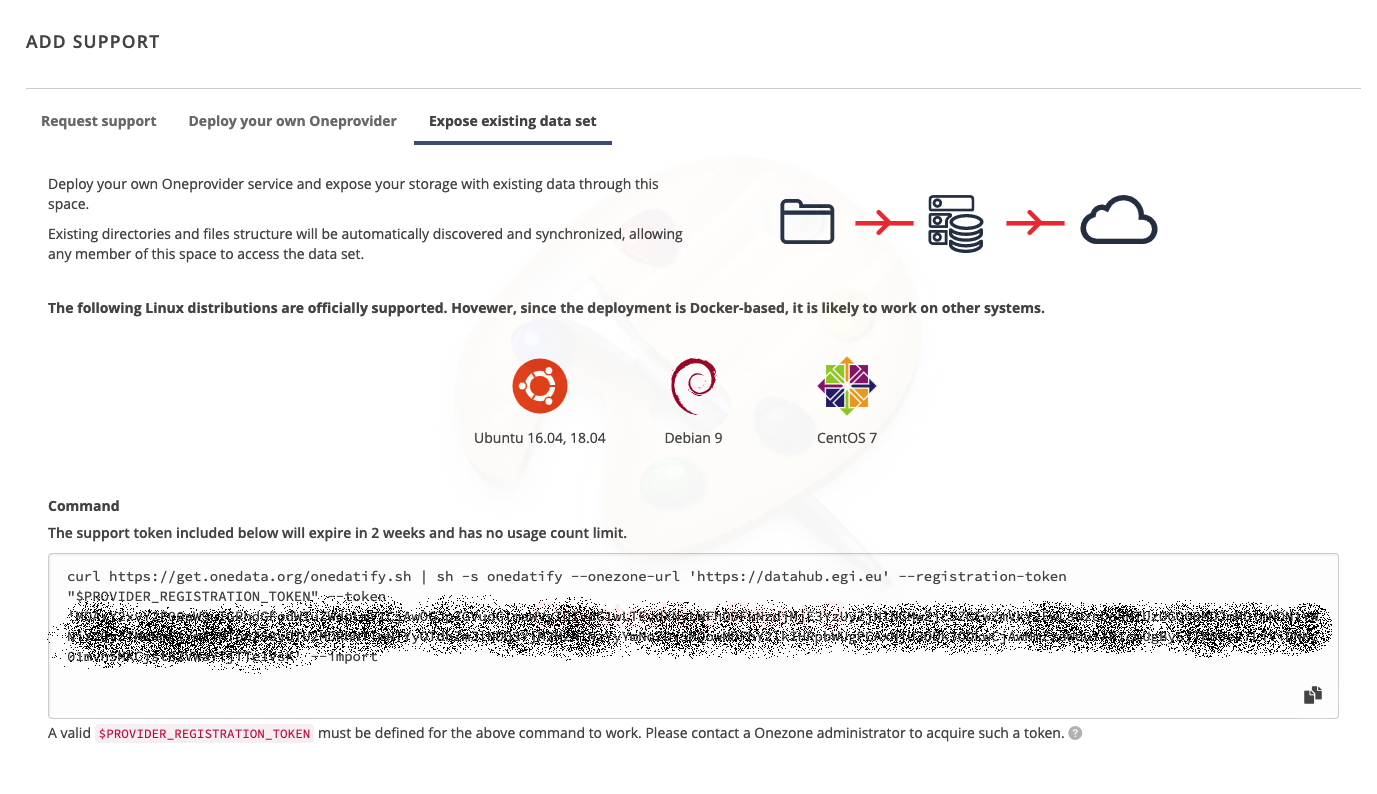
Run the command on the host
Paste the copied command in the terminal on the Oneprovider machine as superuser, and follow the instructions as for the case of an empty storage.
The only difference is that at the end of the installation and configuration process the existing files will be automatically imported to the OneProvider.
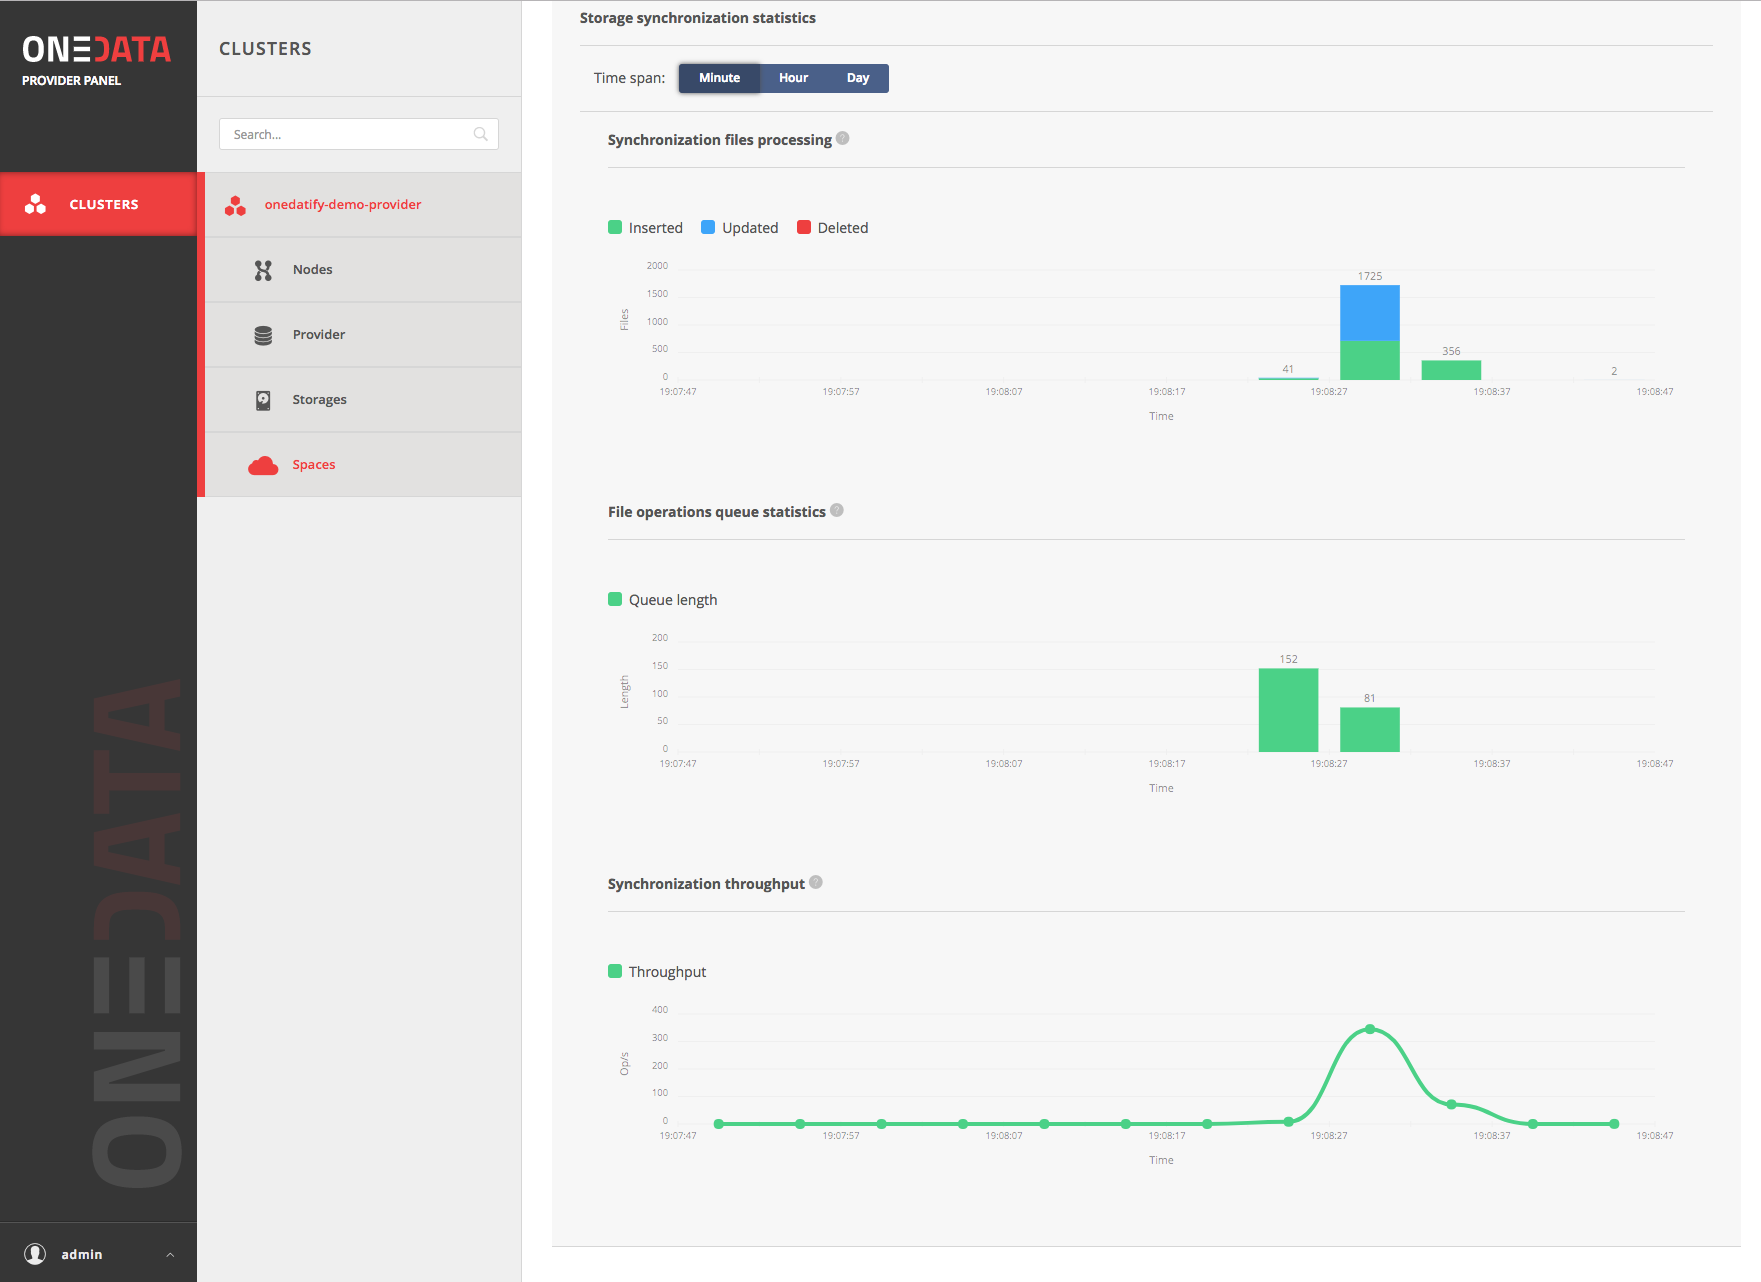
You can monitor the import activity from the administration panel at port 9443.
Additional configuration for EGI DataHub
After completing the installation it might be necessary to add some specific configuration depending on the use case.
Storage Import
Storage import function is used to import files located on a storage and not added or modified directly by DataHub API, client or web interface. For example if another application access the storage directly as, for example in an NFS share. The file registration process creates the necessary metadata so that files that are added, removed or modified directly on the storage are reflected and accessible in the corresponding space. It is possible to configure the storage to automatically detect changes made on the storage using the continuous scan option or by manually triggering scans.
In general, there are three basic space usage scenarios to be considered before deciding to enable the automatic scan of the storage or to perform a single scan:
- An initially empty space, modified only via DataHub -> no need to enable the auto-scan or to perform a manual scan.
- A space with some initial data that has been imported once and then the space is only modified via DataHub -> In this case the auto scan is not needed however it needs to somehow guard the storage from external modifications otherwise it will desynchronise with the space. E.g.: all changes should be done trough API, DataHub client or the web interface.
- A space that exposes a dataset from a storage that later is still dynamically changing outside of DataHub (when it is assumed that some modification can happen at some point) -> in this case continuous scan is needed.
Every storage import scan causes additional load on the Oneprovider. If the space is large and changes very often outside of Onedata, it might have a visible impact on the overall performance - but we are talking millions of files and hundreds of changes per second. Otherwise, having the continuous scan run in the background at the default value, with interval of 60 seconds should not cause any issues. Depending on the specific needs however, if the loads becomes too high or if the changes need to be applied timely it is possible to increase or decrease this interval respectively.
In the following screenshot is shown how to access the configuration for the storage import:
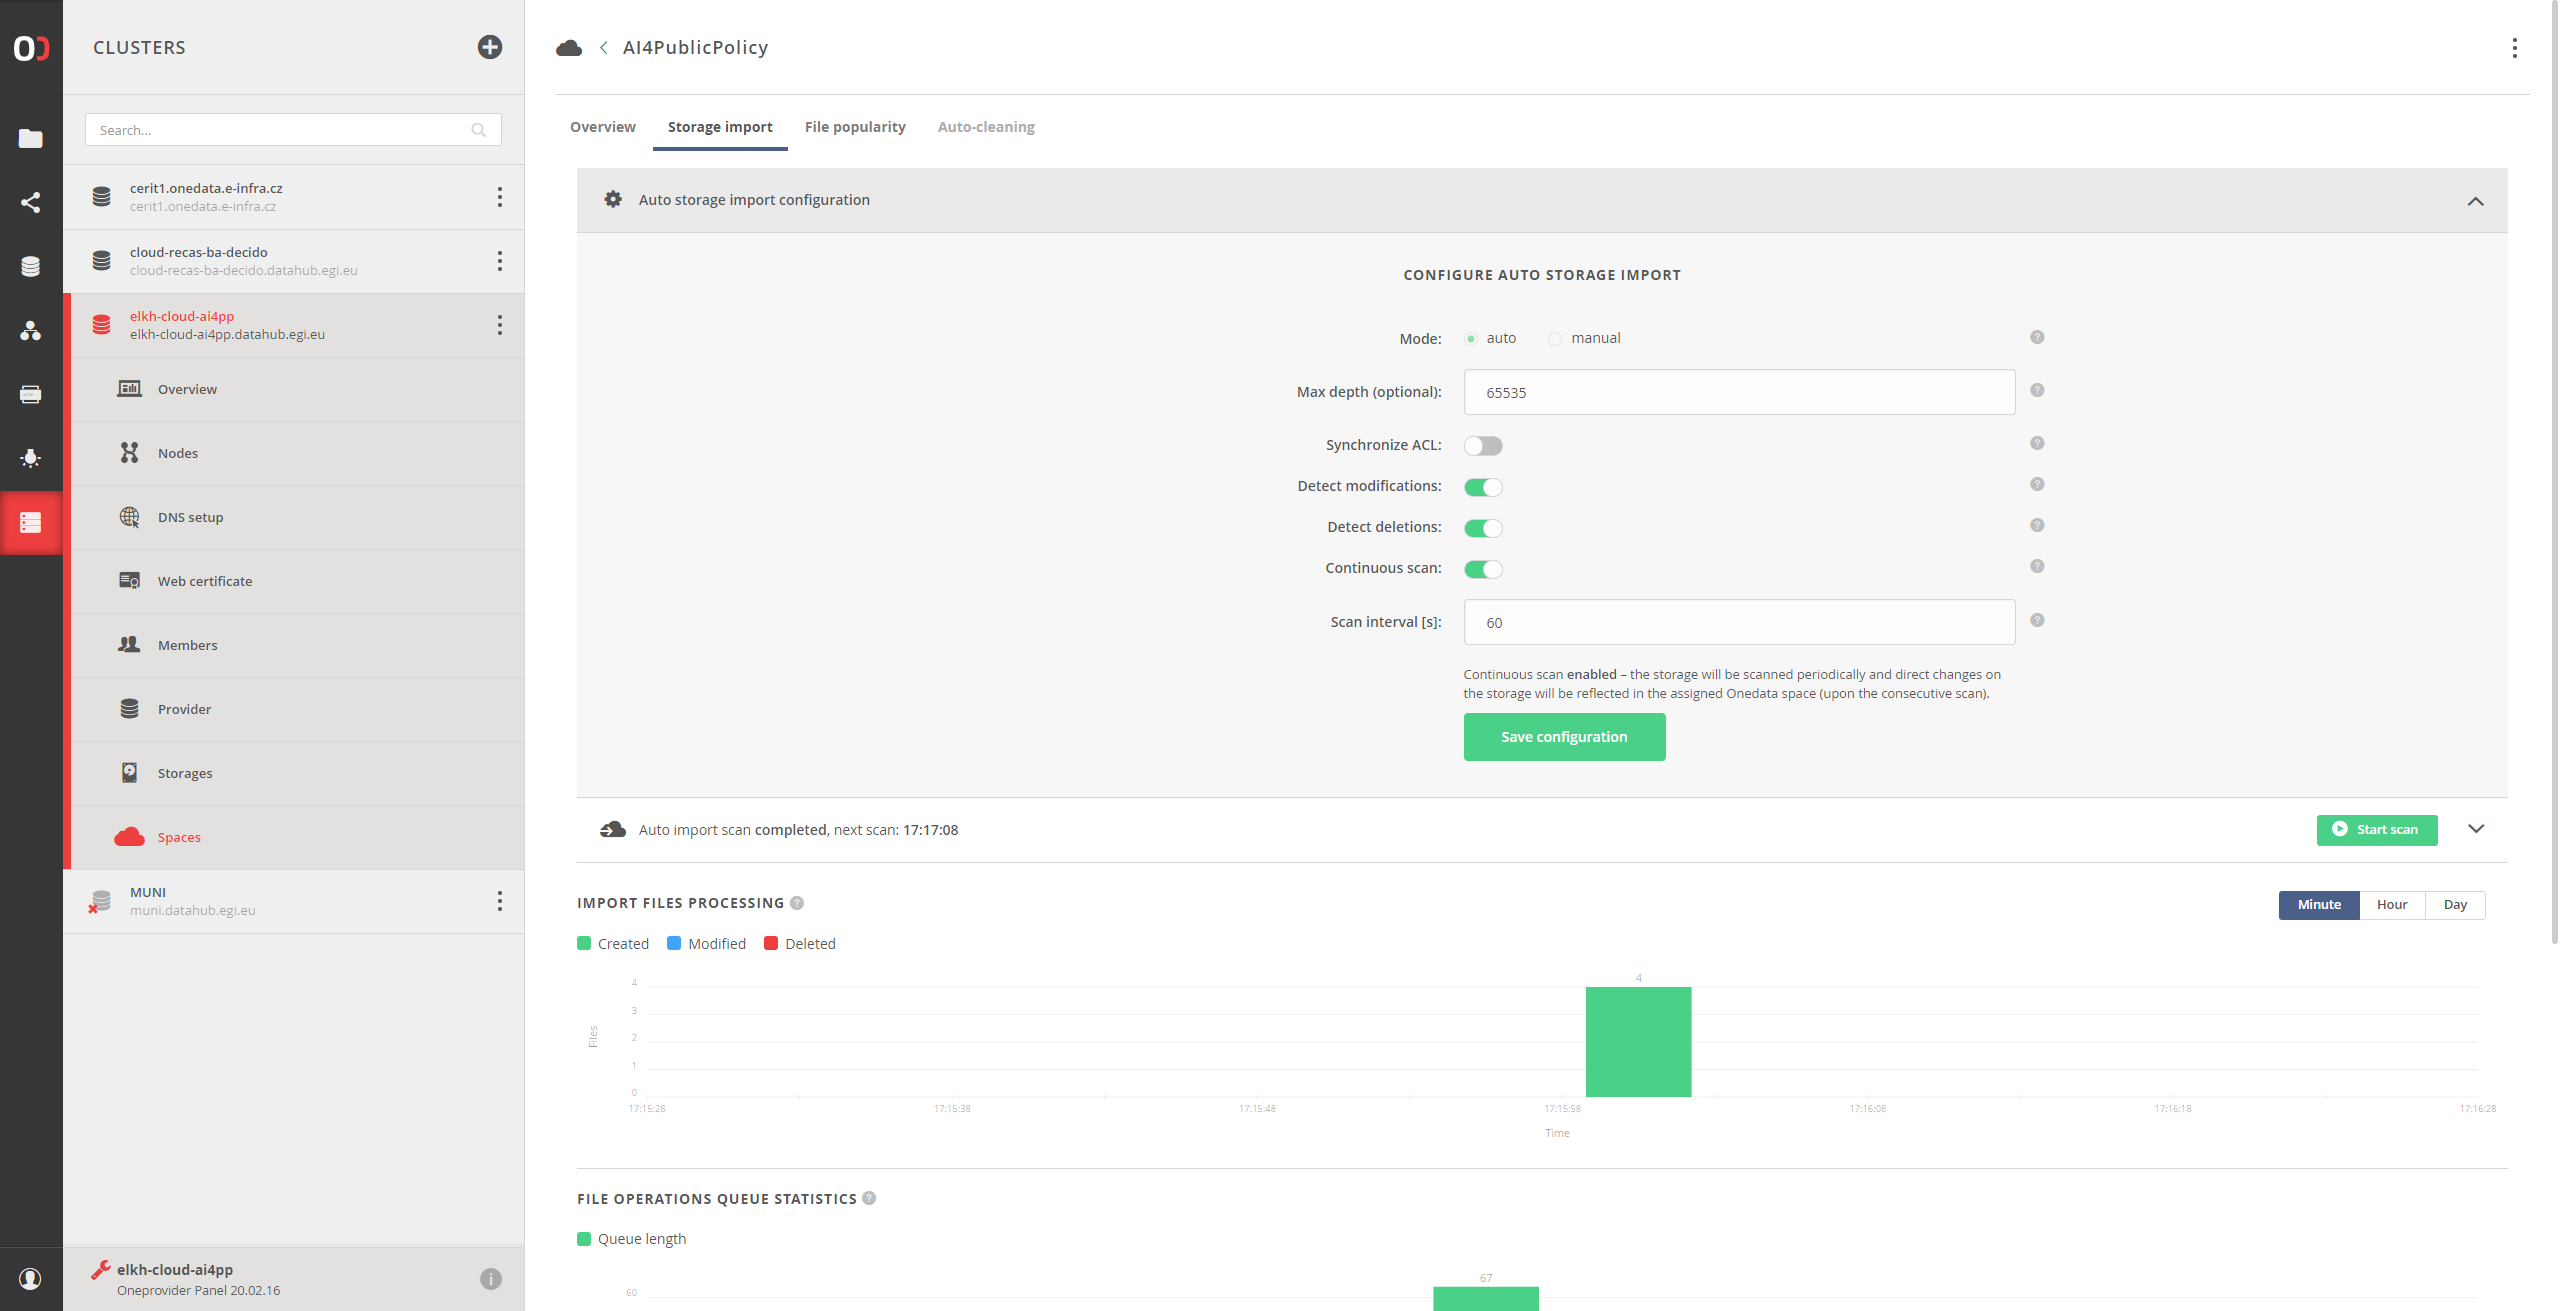
This configuration page is located under the “CLUSTER” tab in the main page. There we should select the cluster that is providing the space that we need to configure, Spaces and select the specific space that need to be configured. In the example shown, the “Auto storage import configuration” menu has been expanded and continuos scan enabled.