Notebooks Integrations
Notebooks running on EGI can access other existing computing and storage services from EGI or other e-Infrastructures. For data services, check data section of the documentation
API access to notebooks
You can use the
JupyterHub REST API
with a
valid Check-in token at
https://notebooks.egi.eu/services/jwt.
The endpoint expects an Authorization header to be present in the requests
with your token, e.g.:
$ curl -H "Authorization: bearer $TOKEN" https://notebooks.egi.eu/services/jwt
{"version":"5.3.0"}
You can use the Python requests library to interact with the API.
The code below shows an API GET request to /user using the
token available in the Notebooks session for
authorization. The response contains information about the user.
import requests

api_url = "https://notebooks.egi.eu/services/jwt"

r = requests.get(api_url + "/users",
    headers={
        "Authorization": "Bearer {}".format(open("/var/run/secrets/oidc/access_token").read())
    }
)

r.raise_for_status()
users = r.json()
EGI services: access tokens
Most services integrated with EGI Check-in can handle valid access tokens for authorising users. These are short-lived (normally less than 1-hour) and need to be renewed for longer usage. With EGI Notebooks, you can get a ready-to-use token at any time.
You can obtain a new token at any time with the JupyterLab extension available from the Jupyter Lab interface.
You have two options:
- Copying the token to clipboard
- Saving the token to disk so it’s accessible from your notebook files and/or terminal.
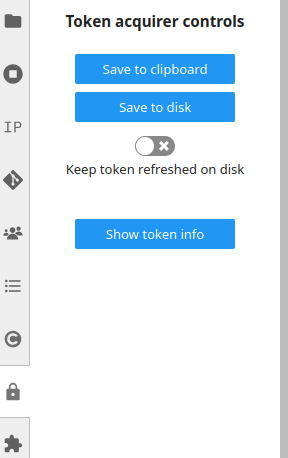
Optionally you can request the token to be continuously refreshed on disk so you don’t need to request new tokens.
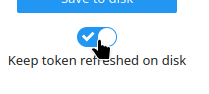
When you save the token on the disk, it will be available at
/var/run/secrets/egi.eu/access_token. See for example below some
python code to access cloud providers of the EGI cloud, where a list of
VMs is obtained from CESGA’s OpenStack:
from keystoneauth1.identity import v3
from keystoneauth1 import session
from novaclient import client


with open("/var/run/secrets/egi.eu/access_token") as f:
    access_token = f.read()

auth = v3.OidcAccessToken(auth_url="https://fedcloud-osservices.egi.cesga.es:5000/v3",
                          identity_provider="egi.eu",
                          protocol="openid",
                          project_id="3a8e9d966e644405bf19b536adf7743d",
                          access_token=access_token)
sess = session.Session(auth=auth)
nova = client.Client(session=sess, version=2)
nova.servers.list()
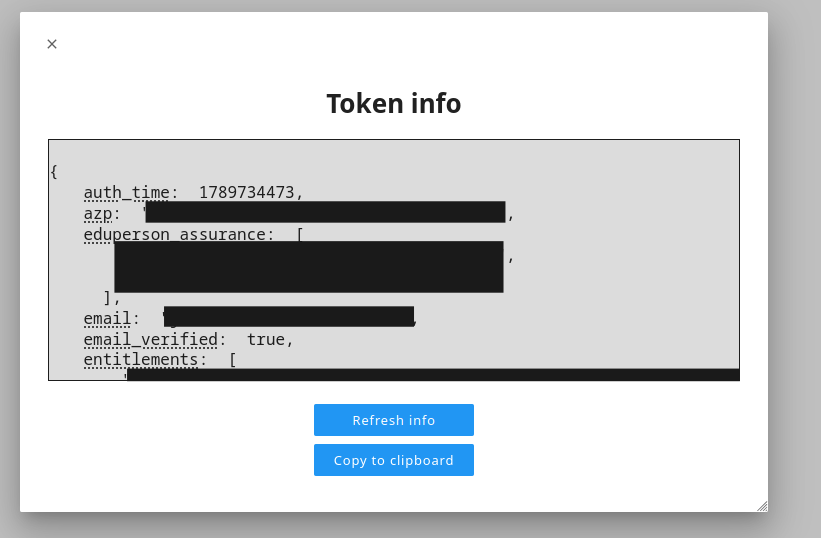
Additionally, the Token Acquirer extension allows you to show you information about your token, if you click on Show token info button.
token management and real-time collaboration
The token information is quite sensitive and therefore users need to take actions in order to avoid credentials leaking.
This is particularly relevant when the Notebooks environment is shared with other users and Real Time Collaboration is enabled.
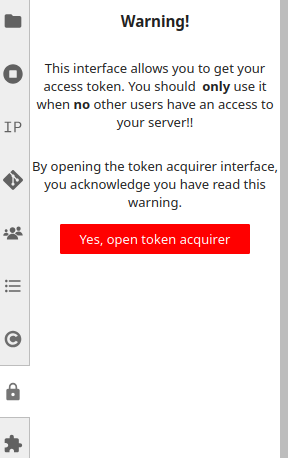
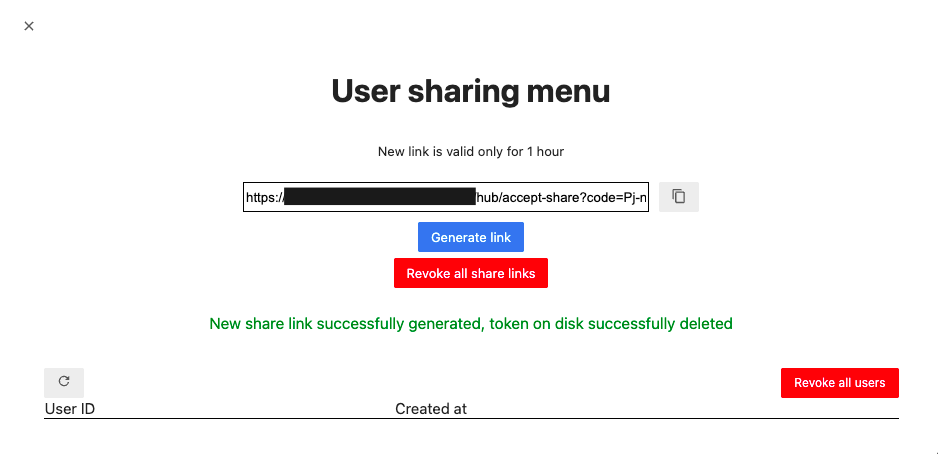
In order to avoid issues, the User Sharing functionality explicitly checks for access tokens saved on disk and eventually allows to remove them before sharing the Notebooks server with other users.
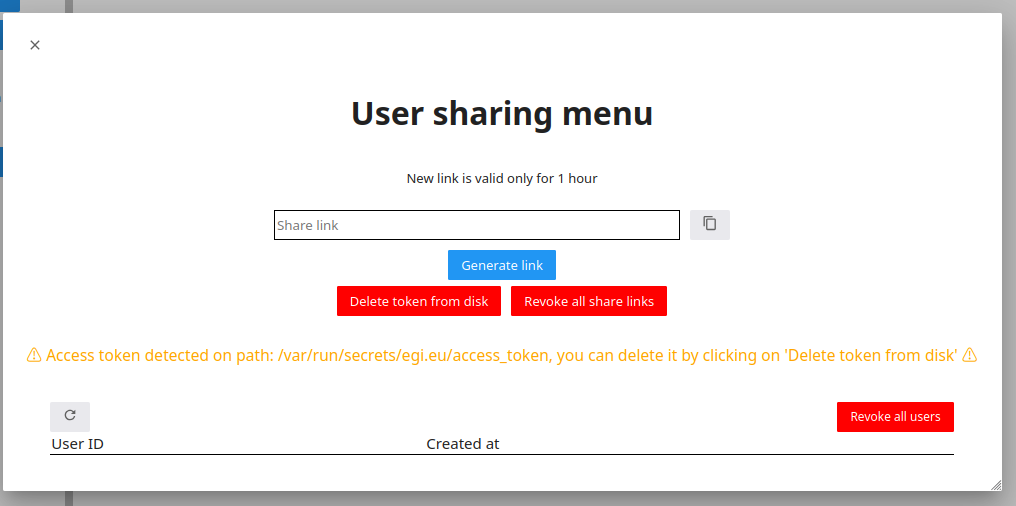
If the user does not delete the token on disk prior to create a Share link, the extension automatically remove the token.
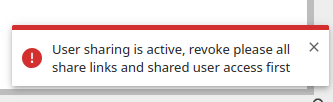
Also, when there is either an invited user or still active share-link, the Token Acquirer will refuse to issue a token to you, unless all sharing is revoked.
fedcloud client
A direct benefit of the integration with access tokens in EGI Notebooks is that you can easily work with the fedcloud client. Once logged into the EGI Notebooks open a terminal and run:
export OIDC_ACCESS_TOKEN=`cat /var/run/secrets/egi.eu/access_token`
fedcloud token check
If the fedcloud command is not available, please follow the
fedcloud client guide guide to get it.
EGI Workload Manager (DIRAC)
If you are using a Notebooks instance integrated with EGI Workload Manager, you may access the DIRAC client via CVMFS with the following two command lines:
$ source /cvmfs/dirac.egi.eu/dirac/bashrc_egi_dev
$ dirac-login --issuer=https://dirac.egi.eu/auth
D4Science
If you are using a Notebooks instance integrated with D4Science, you can easily
invoke DataMiner or any other D4Science functionality as the service will
provide the GCUBE_TOKEN environment variable with a valid token.
This code will print the list of DataMiner methods available within your VRE:
import os
from owslib.wps import WebProcessingService

# init http header parameter and base folders for gCube REST API
gcube_vre_token_header = {'gcube-token': os.environ["GCUBE_TOKEN"]}
# init WPS access for DataMiner algorithms
dataminer_url = 'https://dataminer-prototypes.d4science.org/wps/WebProcessingService'
wps = WebProcessingService(dataminer_url, headers=gcube_vre_token_header)

for process in wps.processes:
    print('- Name: ', process.title)
DataMiner algorithms can be invoked also from Notebooks, this code shows a sample:
from owslib.wps import ComplexDataInput, monitorExecution

# define processid and inputs
processid = 'org.gcube.dataanalysis.wps.statisticalmanager.synchserver.mappedclasses.transducerers.WOFOST_CLOUD_V0_2_1'
inputs = [
    ('ClassToRun', 'nl.wur.wofostsystem.App'),
    ('FileInput',
        ComplexDataInput(
            'https://data.d4science.org/shub/E_eVhZTzBWWktOaVJxQjJkdTUxR3FHaTFFdE9BTDYrZkZxQnFWcGMyaVVJbXptejdDOEFpSVNmam82RllkRUJ6cA==',
            mimeType="text/xml")
    )
]

# execute the process
execution = wps.execute(processid, inputs)
monitorExecution(execution, sleepSecs=5, download=True)
print(execution.status)
Note that inputs that point to a URL should be specified using the
ComplexDataInput class as shown above.
Other third-party services
We are open for integration with other services that may be relevant for your
research. Please contact support <at> egi.eu with your request so we can
investigate the best way to support your needs.